
You have 0 items in your cart

Why Your Real Estate Deal Needs a Checklist
Real estate transaction checklists are essential tools that guide real estate professionals, buyers, and sellers through the complex process of property transfers. If you’re looking for a reliable real estate transaction checklist, here’s what you need:
Quick Real Estate Transaction Checklist Overview:
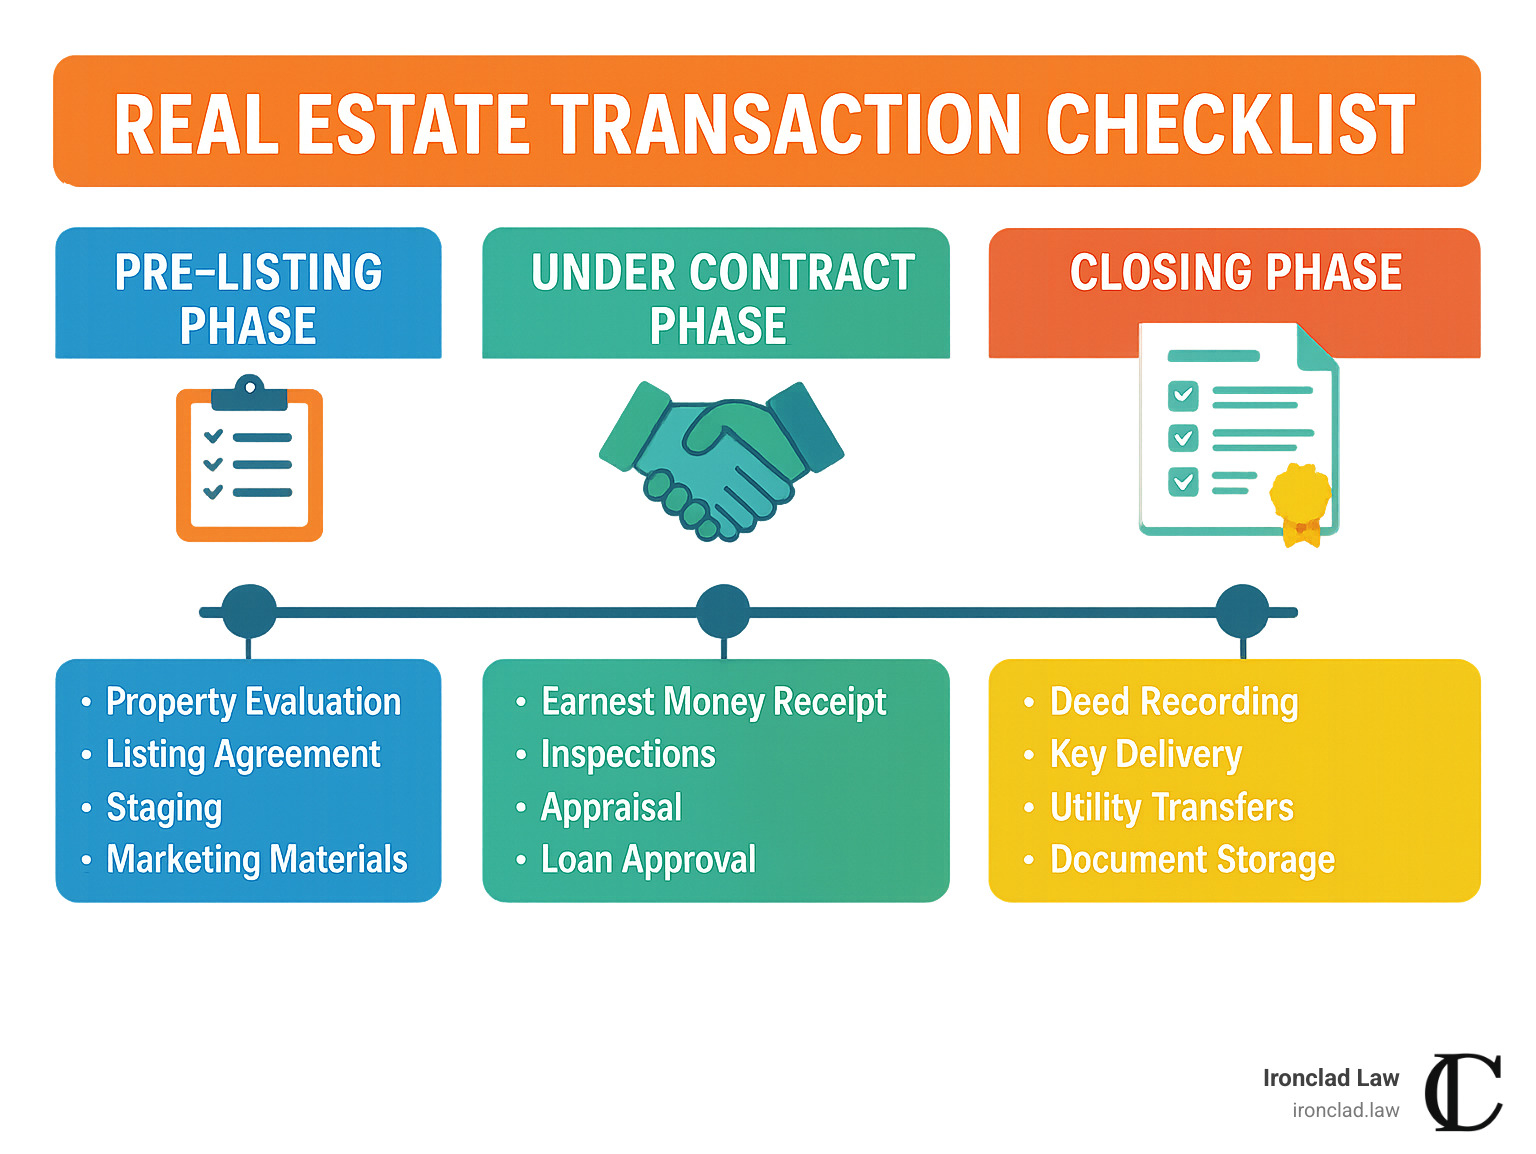
1. Pre-Listing Phase: Property evaluation, listing agreement, staging, marketing materials
2. Under Contract Phase: Earnest money receipt, inspections, appraisal, loan approval
3. Closing Phase: Title commitment, closing disclosure, wire verification, final walkthrough
4. Post-Closing Phase: Deed recording, key delivery, utility transfers, document storage
Managing a real estate transaction without a checklist is like cooking a complex meal without a recipe—there’s a big chance you’ll forget key ingredients or miss a step and end up with subpar results. The stakes in real estate are significantly higher than a disappointing dinner, with potential legal and financial consequences that can haunt you long after closing day.
A well-planned checklist helps you manage each step without overlap or delay, making task management more straightforward and organized, especially when handling multiple closings in one day. Whether you’re a buyer, seller, or real estate professional, a comprehensive checklist ensures nothing falls through the cracks.
In the world of real estate, missing a single detail can be the difference between a successful deal and a costly mistake. With hundreds of tasks bound by strict deadlines and legal requirements, having a structured system is non-negotiable for professionals who want to provide excellent service while protecting themselves from liability.
I’m Michael Hurckes, Managing Partner at Ironclad Law, where I’ve guided countless clients through complex real estate transactions using carefully crafted real estate transaction checklists that help prevent legal complications and ensure regulatory compliance. My experience in both litigation and corporate advisory roles has shown me that a comprehensive checklist is the first line of defense against the most common—and costly—transaction pitfalls.
Why This Guide Matters
At Ironclad Law, we’ve seen how overlooked tasks can spiral into serious legal issues. A missing signature here, a skipped disclosure there—these seemingly minor oversights can lead to significant litigation risk. In New York’s competitive real estate market, the margin for error is razor-thin.
Our litigation team regularly handles cases that could have been prevented with proper transaction management. From contract disputes to disclosure violations, many legal headaches stem from disorganized processes. Beyond avoiding lawsuits, a comprehensive checklist dramatically improves client satisfaction. When buyers and sellers feel confident that nothing is being overlooked, they’re more likely to refer you and leave positive reviews.
Why Every Deal Needs a Real Estate Transaction Checklist
Have you ever felt that nagging worry that you’ve forgotten something important during a real estate transaction? You’re not alone. As someone who’s guided countless clients through property deals, I’ve seen how a real estate transaction checklist transforms chaos into clarity.
Think of your checklist as the unsung hero of your real estate journey. Beyond just keeping things tidy, it delivers tangible benefits that impact your bottom line and peace of mind.
When you implement a structured checklist, you’ll notice immediate improvements in error reduction – those critical steps and documents simply don’t fall through the cracks anymore. Our clients typically experience an efficiency boost, closing deals about 30% faster than before. Clear accountability means no more awkward “I thought you were handling that” conversations with team members or clients.
Perhaps most importantly for professionals, a comprehensive checklist provides a robust legal compliance framework and creates an audit trail that can prove invaluable if questions arise later. And let’s not forget the significant stress relief that comes from knowing you’re following a proven roadmap.
Research from the National Association of Realtors confirms what we’ve seen in practice: systematic transaction management dramatically improves client satisfaction while reducing complaints after closing.
How Checklists Slash Mistakes and Save Money
The financial consequences of transaction errors can be startling. Let me share some real-world scenarios we’ve encountered:
A single missed signature on an initial page once delayed a client’s closing by four days, causing their rate lock to expire and costing them an additional $3,700. Another client nearly lost their dream home when late contingencies weren’t removed on schedule, giving the seller leverage to entertain backup offers. And we’ve seen numerous funding delays push closings past month-end, creating complicated proration issues that cost buyers hundreds in unexpected fees.
One of our Manhattan brokerage clients implemented our checklist system and reported a 78% reduction in transaction problems and spent 45% less time managing each deal. Their return on investment was both immediate and substantial – not to mention the boost to their professional reputation.
Communication & Accountability Superpowers
A well-designed real estate transaction checklist doesn’t just organize tasks – it transforms how everyone communicates.
By establishing clear task ownership, each item gets assigned to the appropriate party, eliminating confusion about who’s responsible for what. Automatic reminders ensure deadlines don’t slip by unnoticed, while stakeholder updates give everyone visibility into the process, dramatically reducing those anxious “what’s happening?” calls.
At Ironclad Law, we’ve refined our closing services to leverage these communication benefits. Our attorneys work side-by-side with real estate professionals, maintaining accountability throughout every transaction phase.

Real Estate Transaction Checklist = Compliance Shield
New York’s real estate regulations create a particularly complex landscape. State-specific disclosure requirements, local ordinances, and federal guidelines form a regulatory maze that’s challenging to steer without a systematic approach.
Your checklist serves as a powerful compliance shield by tracking state regulations like property condition disclosures, RESPA guidelines governing settlement procedures, fair housing compliance documentation, and even DCF requirements for transactions involving child welfare considerations.
As attorneys who specialize in aggressive litigation defense, we’ve seen properly maintained transaction checklists make the difference between a quick case dismissal and a lengthy, expensive legal battle. When documentation is complete and organized, potential disputes often dissolve before they begin.
The modest investment in creating and following a comprehensive real estate transaction checklist pays dividends in protection, efficiency, and peace of mind – making it perhaps the most valuable tool in your professional arsenal.
The Ultimate Real Estate Transaction Checklist: 4 Phases & 40 Must-Do Tasks
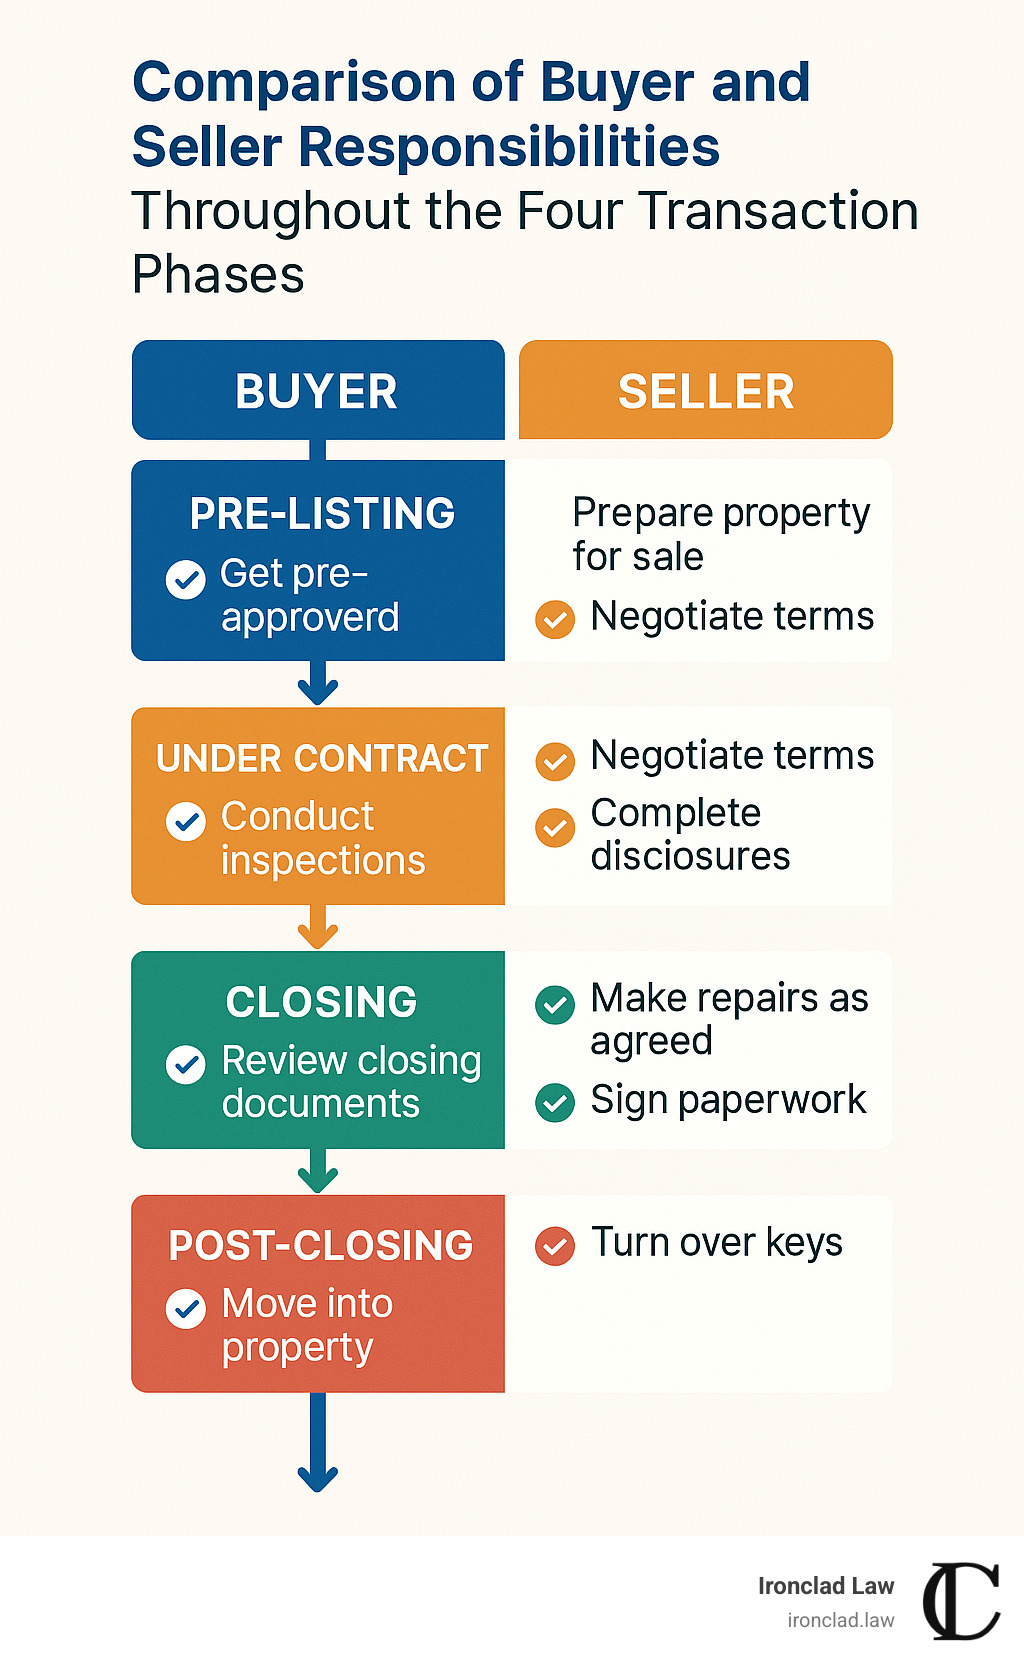
After guiding countless New York property deals, our team at Ironclad has refined what works best into this comprehensive real estate transaction checklist. Think of it as your roadmap through the four critical phases that make up every successful property transfer:
Phase 1 – Pre-Listing Essentials
The foundation of every smooth transaction starts before the property even hits the market. During this crucial setup phase, we focus on getting the complete picture of what we’re selling.
First, complete a thorough Comparative Market Analysis (CMA) to establish realistic pricing. I always tell clients that proper pricing from day one saves headaches later – no one wants to chase the market down! Document the property’s current condition with detailed photos (the good and the not-so-good), verify property tax information, and identify any repairs that might become negotiation points later.
Next comes the paperwork foundation. Execute a clear listing agreement that spells out everyone’s expectations. In New York especially, proper seller disclosure forms are non-negotiable – I’ve seen deals collapse months later over undisclosed issues that should have been addressed upfront. Gather any existing surveys, floor plans, and if applicable, all HOA documentation including those often-overlooked fee schedules.
Marketing preparation makes all the difference in attracting qualified buyers. Schedule professional photography (dark, blurry smartphone pics won’t cut it in today’s market!), craft compelling property descriptions, and develop your online listing strategy. Don’t forget the practical touches like lockbox installation and signage where permitted.
Finally, prepare your sellers for what’s ahead. Provide specific staging recommendations (that cluttered spare bedroom won’t photograph well), create a showing schedule that works with their life, establish how offers will be communicated, and review a net proceeds estimate so there are no financial surprises.
Phase 2 – Under Contract Milestones
Once you’ve accepted an offer, the real work begins. This phase is where most deals encounter turbulence, but your checklist keeps everything on track.
Start with solid contract management. Verify that earnest money was not only promised but actually deposited. Distribute fully executed contracts to all parties (you’d be surprised how often someone is accidentally left out of this step). Create a timeline of every contractual deadline and schedule the closing date and location.
The due diligence period requires careful orchestration. Coordinate property inspections, manage what can sometimes be tense repair negotiations, track all contingency deadlines religiously, and verify HOA approval if relevant. One missed deadline here can completely change the dynamics of your deal.
Simultaneously, monitor the financing process. Confirm the buyer’s loan application was actually submitted (not just promised), track the appraisal scheduling and results, monitor loan approval progress, and verify insurance requirements. At Ironclad Law, our contract review services help identify potential issues before they derail your transaction.
Don’t forget the title work! Order the title commitment promptly, review it carefully for exceptions and requirements, resolve any title issues or encumbrances, and confirm survey requirements. I recommend setting up automated reminders for all these deadlines – when you’re juggling multiple transactions, it’s too easy for something critical to slip through the cracks.
Phase 3 – Closing Countdown
As closing approaches, the pace accelerates and the stakes get higher. This is when attention to detail becomes absolutely crucial.
Begin with pre-closing verification. Review the title commitment thoroughly and resolve any lingering issues. Confirm all contingencies have been officially removed (not just verbally promised). Verify final loan approval and “clear to close” status, and schedule the closing disclosure review.
Coordination becomes your primary job now. Nail down the exact closing time and location with all parties. Verify wire instructions through secure channels (wire fraud attempts spike during this phase). Prepare for the settlement statement review and schedule the final walk-through.
Document preparation kicks into high gear. Review the closing disclosure for accuracy down to the penny. Prepare the seller’s closing documents, confirm commission disbursement authorization, and assemble a complete client file for closing.

On closing day itself, conduct a thorough final walk-through, verify all parties have proper identification, confirm funds have been received, and methodically review and sign all closing documents. I always tell clients to block off more time than they think they’ll need – rushing through closing documents is a recipe for mistakes.
Phase 4 – Post-Closing Follow-Up
Many professionals drop the ball after closing, but this final phase is critical both for compliance and for building lasting client relationships.
Complete the transaction formally by confirming deed recording with the county, verifying disbursement of all funds, delivering keys and all access devices, and updating the MLS status to closed. These simple steps prevent confusion and potential disputes.
Client care continues after the papers are signed. Send a thoughtful closing gift and genuine thank you note, schedule a post-closing check-in call, request reviews and referrals while the positive experience is fresh, and add clients to your past client communication program.
Documentation becomes crucial for both compliance and protection. Organize a complete digital transaction file, store all documents securely, maintain records for the required retention period (which varies by state), and complete any brokerage transaction reporting requirements.
Finally, assist with property transition. Confirm utility transfers have happened, provide home warranty information if applicable, share important local resources with new owners, and schedule a 30-day follow-up to ensure everything is going smoothly.
This post-closing phase might seem like extra work, but it’s your insurance policy against future problems and your best marketing for future business. At Ironclad Law, we’ve seen how proper document storage has saved clients from serious disputes years after closing day.
Customizing Your Checklist for Every Scenario
Just like no two homes are identical, no two real estate deals follow the exact same path. That’s why your real estate transaction checklist needs flexibility to handle whatever unique situation comes your way. Let’s explore how to tailor your checklist for different scenarios you’ll encounter.
Buyer-Side vs. Seller-Side Variations
When representing buyers, your checklist needs special attention to financial preparation and property verification. Make sure to include mortgage pre-approval steps before house hunting even begins—this saves everyone time and heartbreak. Schedule home inspections with enough buffer for follow-up specialists if needed. Don’t forget homeowner’s insurance quotes (which buyers often leave until the last minute), along with moving coordination and utility activation scheduling.
On the seller side, the checklist shifts toward presentation and disclosure. Consider adding a pre-listing home inspection option—many sellers find that identifying and addressing issues upfront leads to smoother negotiations later. Include staging and property preparation timelines, comprehensive disclosure document completion, a clear repair negotiation strategy, and a detailed moving out timeline with professional cleaning arrangements.
I’ve seen countless deals where the difference between success and stress came down to having the right checklist variation for each party’s unique responsibilities.
Residential vs. Commercial Nuances
Commercial transactions bring a whole new level of complexity that your checklist must address.
When handling commercial properties, be sure your checklist incorporates thorough zoning verification and use permit research. Add environmental assessment scheduling (both Phase I and potentially Phase II if issues arise). For properties with existing tenants, include tenant estoppel certificate collection and CAM charge reconciliation. Your checklist should also cover triple net lease review and, when applicable, due diligence on existing business operations.
At Ironclad Law, our due diligence counsel services help commercial clients steer these complex requirements without missing critical details. Commercial transactions typically involve sophisticated parties and higher financial stakes, making your comprehensive checklist even more valuable as both a roadmap and protection.
Cybersecurity & Data Privacy Add-Ons
Your transaction checklist isn’t complete without robust security measures. Real estate deals are prime targets for cybercriminals, and a few critical checklist items can protect everyone involved.
Make wire fraud prevention a prominent section in your checklist. Include a protocol for verbal verification of all wire instructions—never rely solely on email. Add written warnings about wire fraud in all client communications and establish secure document sharing procedures that everyone understands and follows.
Your checklist should also address data protection by requiring encrypted portal usage for document sharing, implementing multi-factor authentication, and redacting personal information from non-essential documents. Don’t forget digital security basics like verifying electronic signature platform security and requiring strong passwords for all transaction parties.
The statistics are sobering—the FBI reports real estate wire fraud attempts have skyrocketed by over 1,100% since 2015, with annual losses reaching hundreds of millions of dollars. Adding these security elements to your checklist isn’t just helpful—it’s essential protection for your clients and your business.
A truly effective real estate transaction checklist grows and adapts with your experience. Each unique transaction teaches valuable lessons that can be incorporated into your master checklist, making it more robust and versatile with every deal you close.
Tech, Automation & Compliance Power-Ups
Let’s face it – managing real estate transactions can feel like herding cats. But with today’s technology, your real estate transaction checklist can transform from a static to-do list into a dynamic powerhouse that practically runs itself.
Platforms & Tools That Make It Happen
Remember the days of paper checklists stuffed in manila folders? Those days are thankfully behind us. Today’s digital platforms do so much more than just track tasks – they transform how you manage entire transactions.
Dotloop has become something of an industry darling, with over 11,000 professionals downloading their buyer and seller checklists. What makes it special? Everything lives in one digital “loop” where all parties can access documents, sign electronically, and track progress.
I’ve seen many of our clients at Ironclad Law fall in love with Manifestly, especially those working in teams. The real-time updates mean everyone stays on the same page – literally. When your transaction coordinator marks the inspection as complete, everyone sees it instantly.
For those looking to dip their toes in the water without a major investment, Paperless Pipeline offers free transaction checklists that break down the process into logical phases. It’s a great starting point if you’re transitioning from paper to digital.
The magic happens when these platforms start working for you. Imagine never having to remember a deadline again because automated reminders notify everyone involved. Picture a dashboard showing exactly where each transaction stands at a glance. Envision clients logging into their portal at 10 PM to check progress instead of texting you after hours. That’s the reality these systems create.
Perhaps most impressive is how AI has entered the transaction management space. Modern systems can automatically extract key dates from contracts, sequence tasks based on transaction type, flag missing documents before they become problems, and send status updates to all parties. According to our partners at ListedKit, these features can reduce errors by up to 90% – that’s the difference between constant fire-fighting and smooth sailing.
Integrate With Your Existing Stack
A fancy transaction management system won’t help much if it exists in isolation. The real power comes when your real estate transaction checklist talks to your other tools.
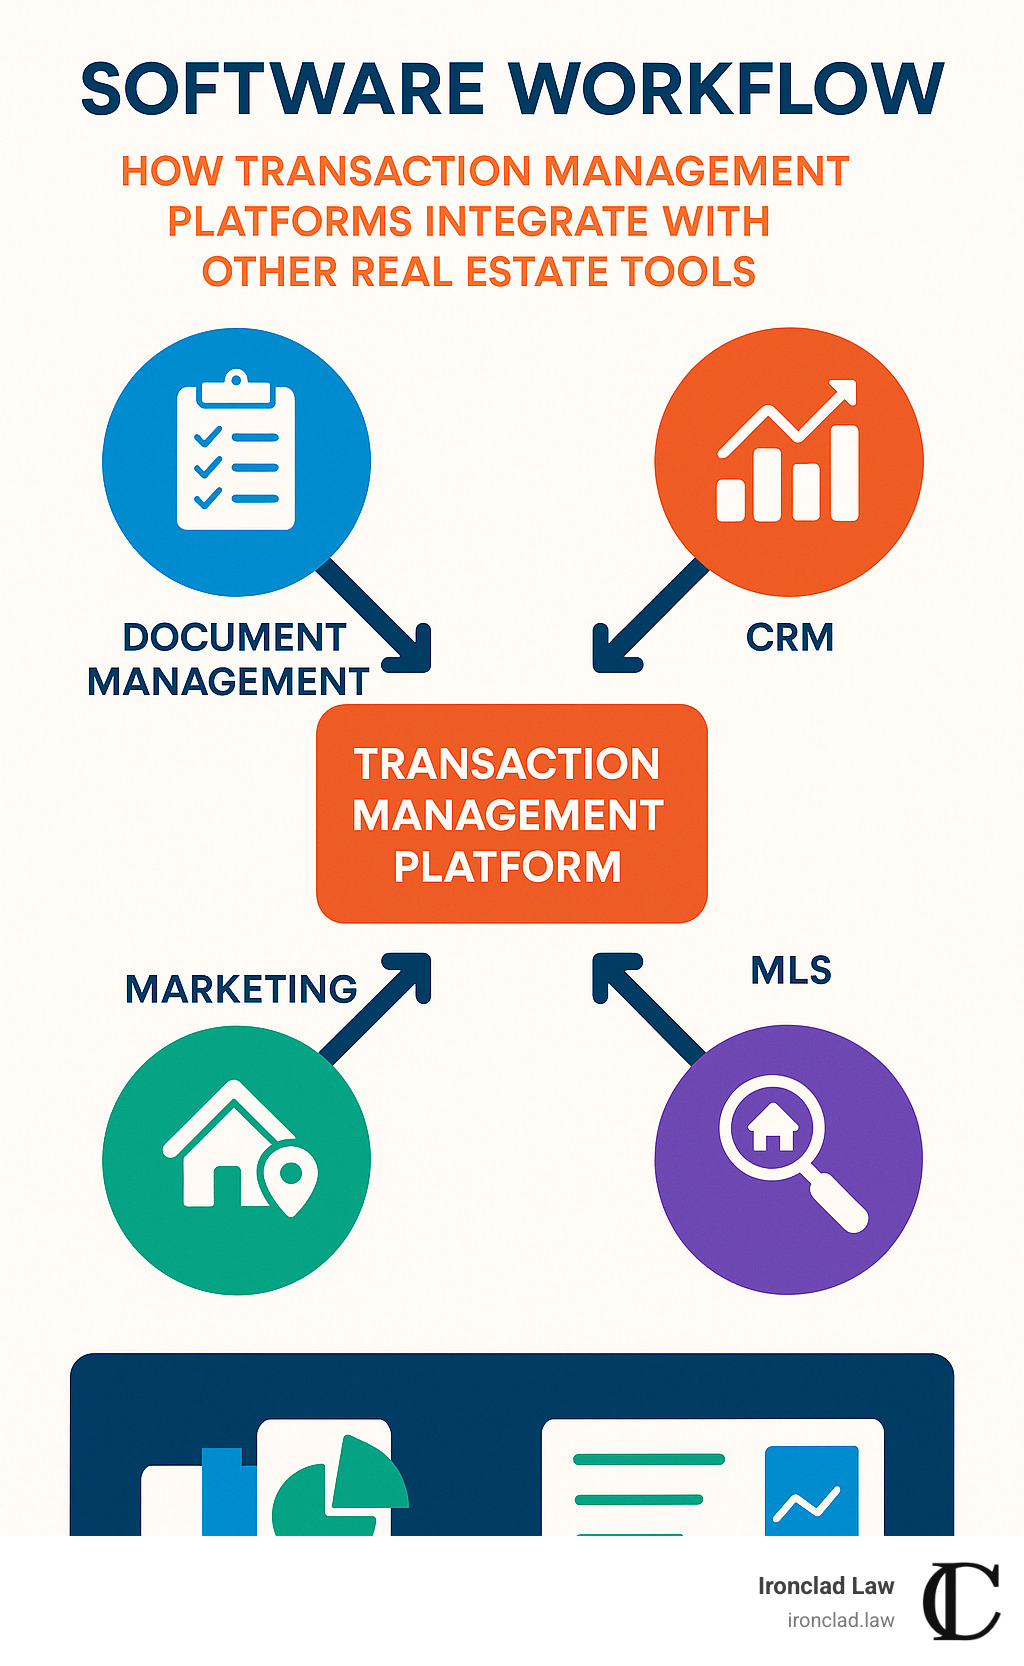
The essential connections start with your calendar. When a transaction milestone gets scheduled, it should automatically appear in your Google or Outlook calendar. Your CRM should update client records as the transaction progresses. Documents should flow seamlessly between your transaction system and cloud storage like Dropbox or Google Drive. Email integration means communication stays organized and tracked alongside the transaction itself.
For power users, API connections to brokerage management systems create even greater efficiency. MLS integration allows listing updates to trigger checklist items automatically. Accounting software connections help track commissions without duplicate data entry. And e-signature integration means documents get signed and returned without ever leaving the system.
At Ironclad Law, we help clients implement comprehensive corporate governance systems that include robust transaction management. We’ve seen these integrations reduce transaction management time by as much as 70% while simultaneously improving compliance and making clients happier. That’s not just efficiency – it’s change.
The best part? These systems create a permanent, searchable record of every transaction – a lifesaver if questions or disputes arise months or years later. In our litigation practice, we’ve seen countless cases where digital transaction records made the difference between a quick resolution and a protracted legal battle.
Technology should make your life easier, not more complicated. The right system feels intuitive from day one and grows with you as your needs evolve. Whether you’re a solo agent or managing a team of dozens, there’s a digital solution that can take your transaction management to the next level.
Frequently Asked Questions about Real Estate Transaction Checklists
What is the first step in any real estate transaction?
Starting a real estate journey begins with finding people you can trust. If you’re buying, you’ll want to connect with a knowledgeable real estate agent who understands your needs and a reliable lender who can help you understand your financial options. For sellers, finding an agent who knows your neighborhood and has a solid track record of successful sales is crucial.
But here’s something many people overlook: you should actually start your real estate transaction checklist before you’ve even found a property or listed your home. At Ironclad Law, we’ve seen how this early preparation gives our clients a significant advantage, helping them avoid the last-minute scramble that often leads to mistakes.
Think of your checklist as your roadmap—you want to have it ready before the journey begins, not halfway through when you might already be off course.
How can I adapt a checklist to my state’s regulations?
Real estate regulations can vary dramatically from one state to another, and New York has some particularly unique requirements. Creating a state-specific checklist isn’t just helpful—it’s essential for compliance and peace of mind.
To tailor your real estate transaction checklist to New York or any specific state, start by researching the required forms and disclosures particular to that location. The New York State Association of REALTORS® offers excellent resources for this. Next, connect with local attorneys who specialize in real estate—they’ll know the nuances that generic checklists might miss.
Don’t forget to incorporate local timelines into your checklist. In New York City, for example, co-op and condo board approval processes can add significant time to transactions. These boards often have their own documentation requirements and review periods that must be factored into your timeline.
At Ironclad Law, we help clients steer these New York-specific requirements, ensuring their checklists reflect the realities of our local market—whether that’s the cooperative approval process in Manhattan or the particular disclosure requirements for Long Island properties.
Are there free, downloadable checklist templates available?
Yes! You don’t need to start from scratch when creating your real estate transaction checklist. Several quality resources offer free templates that can give you a solid foundation:
Dotloop provides popular buyer and seller checklists that real estate professionals love—they’ve been downloaded more than 11,000 times. Paperless Pipeline offers comprehensive templates specifically designed for transaction coordinators working with both buyers and sellers.
These templates come in various formats to suit your working style. You’ll find PDFs for printing or electronic completion, customizable Canva templates that allow you to add your own branding, and spreadsheet versions for those who prefer Excel or Google Sheets. Many transaction management platforms also include built-in templates that integrate with their software.
While these free resources provide an excellent starting point, most will need some customization to fit your specific needs. The template that works perfectly for a suburban single-family home transaction might need significant modifications for a Manhattan co-op purchase.
We always recommend having your final checklist reviewed by a real estate attorney familiar with your local market. At Ironclad Law, we’ve seen how a small oversight in a checklist can lead to significant complications down the road—it’s worth taking the time to get it right from the start.
Conclusion
Let’s face it – real estate deals are complex beasts with countless moving parts. A thorough real estate transaction checklist isn’t just a nice-to-have tool – it’s your financial and legal safety net. Think of it as the difference between a smooth, profitable closing and a stress-induced nightmare that could haunt you for years.
I’ve seen it at Ironclad Law. The clients who carefully follow comprehensive checklists typically sail through their transactions with minimal issues. Meanwhile, those who wing it often end up in our litigation department, fighting battles that could have been easily prevented with proper documentation and process management.
Your checklist serves as both shield and sword – protecting you from common pitfalls while empowering you to move efficiently through each phase of the transaction. Whether you’re handling your first home purchase or you’re a seasoned agent juggling multiple listings, a well-structured checklist adapted to your specific scenario will dramatically improve your experience and outcomes.
For many of our clients in New York’s competitive market, standard templates just don’t cut it. That’s why we offer customized checklist development services custom to specific transaction types. We understand the unique legal landscape here – from co-op board approvals to specific disclosure requirements – and build these nuances directly into your process.
Our approach at Ironclad Law blends strategic deal counsel with hard-earned litigation experience. We’ve defended clients in disputes that stemmed from overlooked details, and that perspective shapes how we help others prevent similar issues. We’d much rather help you avoid problems upfront than defend you after they’ve already occurred.
Remember the old saying about an ounce of prevention? In real estate transactions, that prevention comes in the form of a comprehensive checklist that catches potential issues before they become expensive problems. Your future self (and your wallet) will thank you for the time invested in proper transaction management today.
Don’t wait until you’re facing a crisis to get organized. Whether you download one of the free templates we’ve mentioned or work with professionals to create a custom solution, implementing a robust real estate transaction checklist is one of the smartest moves you can make in this complex market.